Wednesday, September 30, 2015

Festive Greetings

Hello! Today I have another stamp set to share with you that is releasing from Inspired By Stamping that will get you in the holiday spirit. It's called Festive Greetings. Here's a peek:


And here is my card:


This was a super fun but time consuming card to make. The pretty lights come as an outline and then a solid filler. I wanted lots of glitter so I first had to stamp all my base images and then went back in with sticky embossing powder to fill the light bulbs, poured glitter on and heat set again. I do love how it came out though!


Here is a closer look at that glitter! I love the mix and match possibilities of the sentiments too! I stamped all the little bows, trimmed them out and added some sparkly red glitter pen to the centers. This is a festive but flat card which is great for mailing. Hope you enjoyed my card today. Thanks for stopping by!



Monday, September 28, 2015

Stenciling over a stamped image

Hi there! I have a card up over on the A Walk Down Memory Lane that shows how to give extra texture and interest to stamped images. Here's a peek:


Inspired By Stamping Release! Big Sympathy

Hello everyone! What a fun week we have in store for you with the new Inspired By Stamping release! Today we start with a beautiful sentiment set that is perfect for those hard to make sympathy cards. Here is a look at the set.


Here is my card:


I chose to pair the lovely sentiments with the Tulip Bouquet stamp set. I stamped the lovely flowers onto a die cut using Fancy Labels 2. I heat embossed the sentiment from Big Sympathy in white on a strip of black cardstock. The flowers I colored with Faber Castell Polychromos pencils. 


I added a bit of twine to the bow and a few sequins to finish it off. Be sure to hop around to the rest of the DT to see what other gorgeous creations they've made!


Saturday, September 26, 2015

Four Season's Toadstool

Hello! I wanted to share a recent coloring page from the Enchanted Forest book by Johanna Basford that I added hand drawn elements to and then colored. I am part of a wonderful FB group called Inky Obsession and they had a fun competition using this image with the theme being "seasons". I decided to go for all four :)


I was so surprised to discover that I was chosen as the winner of the competition! There were so many beautiful entries and I am so inspired by everyone's coloring on that group. I had a lot of fun with this and hope you like it too. Thanks for dropping by:)


Friday, September 25, 2015

Watercolor and Salt Background

Hello stamping friends! Today I have a fun and simple technique to share with you using watercolor and salt to make a pretty and unique background.I'll also be using Inspired By Stamping products. Let's get started!
Salt
You'll need some watercolors, a paint brush, clean water, salt and watercolor paper. You start by painting a background with colors of your choosing getting your watercolor paper fairly wet.
Salt2
While your paper is  still wet you sprinkle on some salt. You can now either set it to the side to dry completely or speed up the process with a heat gun. Once your paper is dry gently rub off the salt. You will be left with a subtle stippling effect.
Salt3
Here is a look at the neat texture the salt creates. The salt absorbs the water and the pigment leaving behind this pretty texture and effect. Now you choose some stamps and create a card!
Salt5
For my card I chose to use the beautiful Seaside and Seaside Sentiments stamp sets. I stamped everything using Versafine Onyx Black ink. For my ground, lighthouse and light rays I used Faber Castell Polychromos pencils and blended with odorless mineral spirits (OMS).
Salt4
I finished it with some machine stitching and the little banners cut from the large two ended banner from Fancy Labels 3.
Salt6
I hope you'll give this technique a try if you haven't! It's simple but gives such pretty results that will be a little different each time. Thanks for joining me today!
Inspired-by-Stamping-Supplies-Tools-01_thumb.png
Seaside
Seaside Sentiments
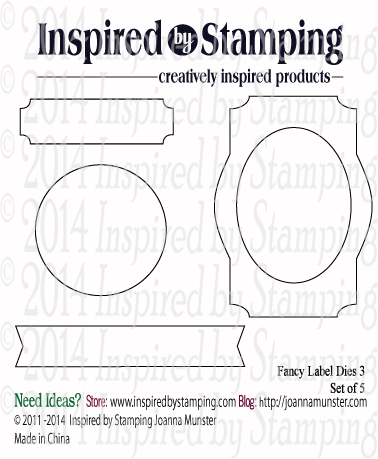
Fancy Labels 3 Die


Monday, September 21, 2015

Coloring Vellum with Gelatos

Hello! I have a technique to share you with over on the A Walk Down Memory Lane blog today. Here's a peek at my card :)


Sunday, September 20, 2015

IBSIC #98

Hello! Today I have a card to share with you using the new IBSIC challenge for Inspired By Stamping. You can choose one, two or all of the inspirations photos for your project. I chose the sketch and a few sequins.

Here is my card:


I did a bit of masking to get my bird where I wanted it but I was happy with how it came out. I used lots of wonderful IBS stamps on this card! The hexagons are from the Hexagon stamp set and I used the polka dot on to fill in the outlines. The script comes from Basic Backgrounds III, the flowers are from Summer Baskets and the bird and sentiment are from Summer Warbler


After all my stamping was done I colored my birdy with Faber Castell Polychromos pencils and blended with OMS. I added my trimmed out flowers and a sequin for the middle of each, some twin and faux stitching. I hope you'll come join the challenge. Thanks for stopping by!


Monday, September 14, 2015

AWDML Blog Sketch

Hi there! I 've got a card up at A Walk Down Memory Lane inspired by this month's blog sketch. Here's a peek:


Wednesday, September 9, 2015

Circle of Teeny Tiny Details

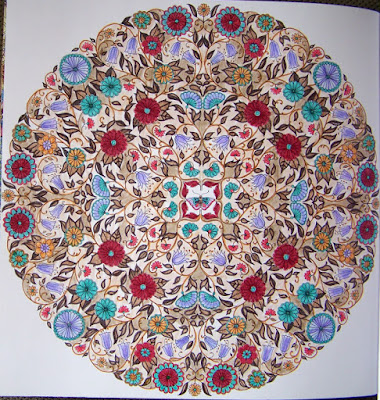
Hello! Well I just finished this page out of my Johanna Basford Secret Garden book. I decided to use my Tombow Markers for it and they worked pretty well though I am more happy with how pencils do on this kind of paper. I am waiting to color anymore pages until my new Faber Castell Polychromos pencils arrive. I am getting very impatient! Anyway, here's the page.


I find these coloring books so relaxing. :)


Monday, September 7, 2015

Heat Embossing on Top of Watercolor Background

Hello! Today I have a card that uses heat embossing on top of a watercolored background as opposed to a resist which goes underneath. My full post is up on the A Walk Down Memory Lane blog. Here's a peek:


Friday, September 4, 2015

Finding some new mojo

Hi! So, I'm sure it's happened to you at times as much as we love all the different things about papercrafting sometimes you just need a bit of a mojo boost. That's how I've been feeling lately and thankfully I found it! You may have been seeing or hearing about adult coloring books. Well I love to color stamped images so the idea of a whole coloring book really intrigued me. So I went looking around on Amazon to see what was out there and fell in love with one particular artist named Johanna Basford. I promptly bought both of the books she has out and have requested her new release (set to come out in October) for Christmas. Here is a glimpse at what I am finding renewed creative energy in.

 All of these pages are from the Secret Garden book. I hand lettered my name. I've been coloring with my Prismacolor pencils but have some gorgeous Faber Castell Polychromos on their way to me! 
 It's very relaxing to sit down and just color. I like that I can have something to work on that is the project in and of itself. Plus my daughter loves to color as well so I bought her a special book and we sit and do it together :)

 I also found a great FB group called An Inky Obsession that focuses on the JB books. It's such a nice supportive group and it's always fun to share! So, have you discovered adult coloring books? I'd love to hear what you think and if you enjoy them as well. Have a blessed day!

Painting with Gelatos

Hello crafty friends! Today I want to share with you how you can use Gelatos to paint your stamped images and backgrounds for beautiful cards and any other project you can dream up. Gelatos are a lot of fun and since I love all things that have to do with watercolor I chose to use them with water for this card. Let's get started!
Poppies4
I knew I wanted to use the large single poppy image from the FOTM: Poppies set from Inspired By Stamping and started by gathering my supplies. I prefer to use a paint brush to apply my Gelatos onto my watercolor paper. I use a little mister bottle of water, spray it on my craft mat and pick up water with my brush as I need it and pull color directly off my Gelato sick with my brush. I chose to use all metallic colors and the end result is very soft and shimmery.
Poppies5
Here you can see I begin painting on my Gelatos. I just painted in layers until I was happy with the color saturation and I didn't try to stay in the lines as I think for this kind of medium a looser look is more pleasing. A great waterproof ink to use is Versafine Onyx Black.
PoppiesHere is my completed card. I did end up adding a couple more colors to my Gelato mix to give some more depth of color. I stamped one of the circles from the Fancy Circles set and then die cut it using the Fancy Labels 3 die set. My double ended banner also comes from the Fancy Labels 3 die set. I added a few sequins to finish it off.
Poppies2
Here is a close up to help you see some of the shimmer the metallic Gelatos give. They are subtle but very pretty.
Poppies3
I hope you will give painting with Gelatos a try if you haven't yet or maybe re-visit this fun medium! Thanks so much for joining me today and have a blessed day.
clip_image007.gif
Signature